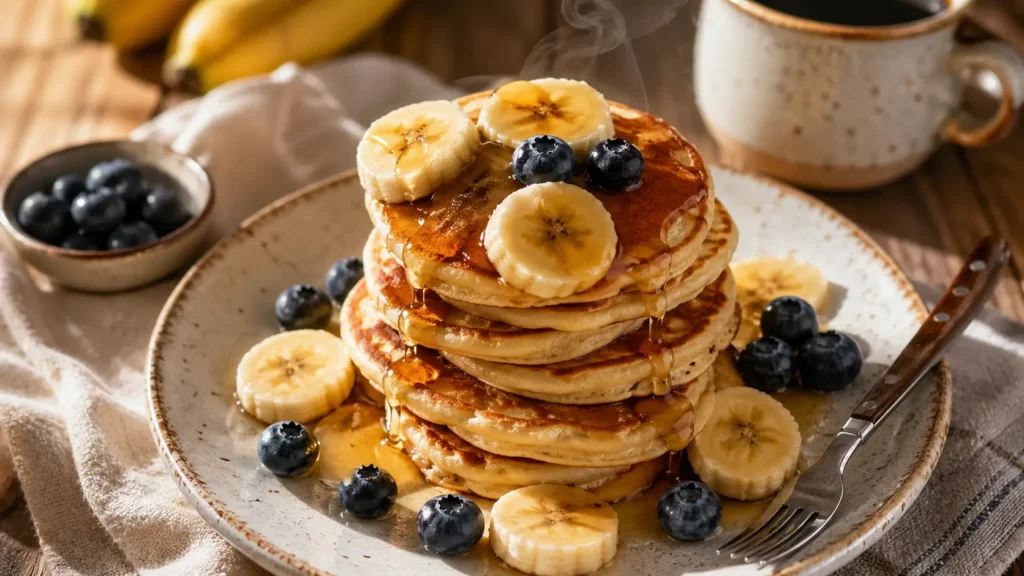
There’s something almost magical about tiny pancakes. Maybe it’s because they cook faster, flip easier, or look ridiculously cute on a plate. But honestly? These fluffy mini banana pancakes became my go-to easy breakfast idea recipe because they actually fit into real life—the kind where you’re half-awake, someone’s asking where their backpack is, and you. You’d have to get food on the table.
I stumbled into this recipe by accident, actually. I had two overripe bananas sitting on my counter (you know, those with the spots you keep ignoring?) and a serious craving for something warm and comforting. What I didn’t expect was how perfectly these little guys would fit into my morning routine. They’re ready in about 15 minutes, freeze beautifully, and taste like you put actual effort in—even when you absolutely did not.
Why These Mini Pancakes Changed My Breakfast Game
The mini size isn’t just adorable—it’s strategic. Regular pancakes can be a gamble. Too thick, and the middle stays gooey. Too thin and they taste like cardboard. But these bite-sized beauties? They cook evenly, brown perfectly, and give you that fluffy texture every single time.
They’re also an easy breakfast for school because kids can eat them with their hands. No syrup dripping everywhere (well, less syrup dripping everywhere). And since they’re naturally sweet from the bananas, you can get away with using less sugar, making them genuinely healthy recipes for school mornings when you’re trying to sneak in some nutrition.
What Makes This Pancake Recipe Banana-Perfect
Let me tell you what sets these apart from your standard pancake mix situation. The mashed banana does double duty—it adds natural sweetness AND moisture, which means your pancakes stay tender instead of turning into hockey pucks by noon. I learned this the hard way after making a batch with barely-ripe bananas once. They tasted… fine. But they weren’t fluffy. The bananas need to be properly ripe, with brown spots, so they mash easily and release their full sweetness.
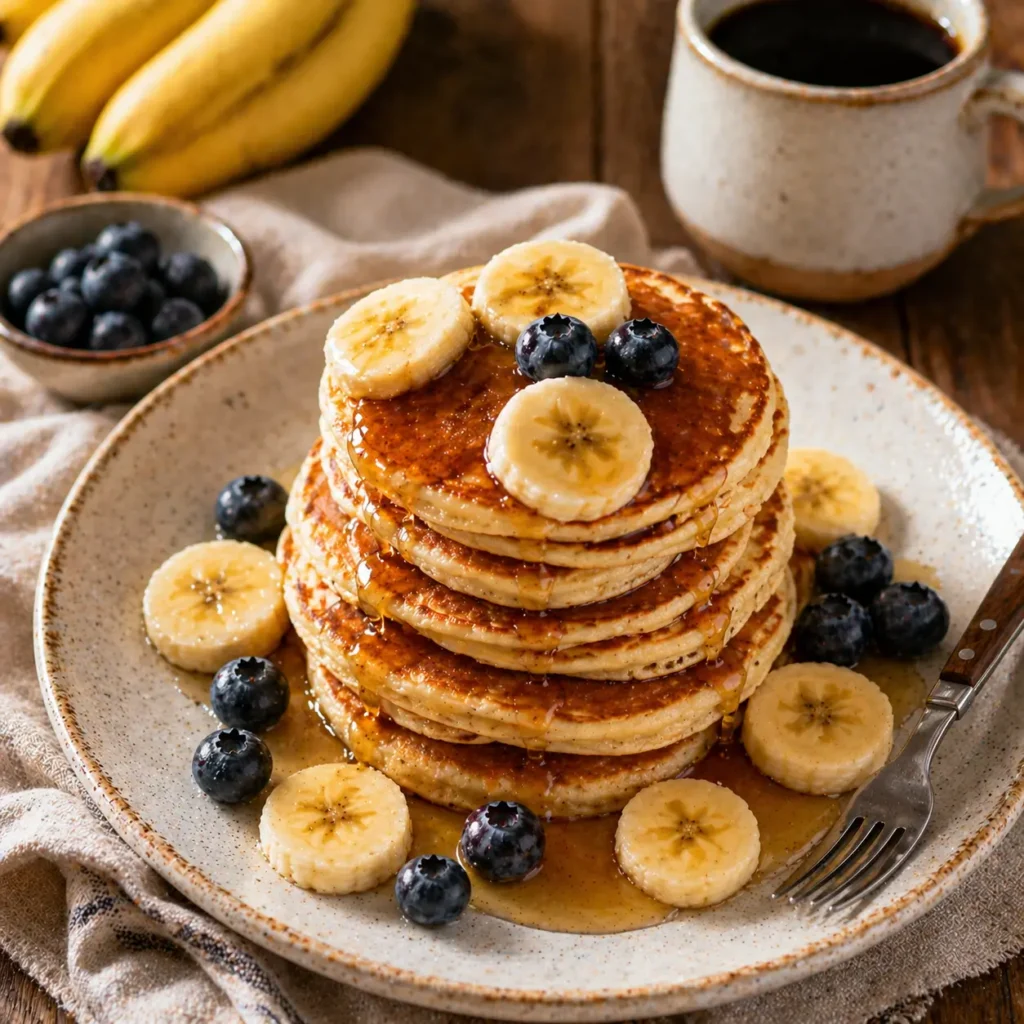
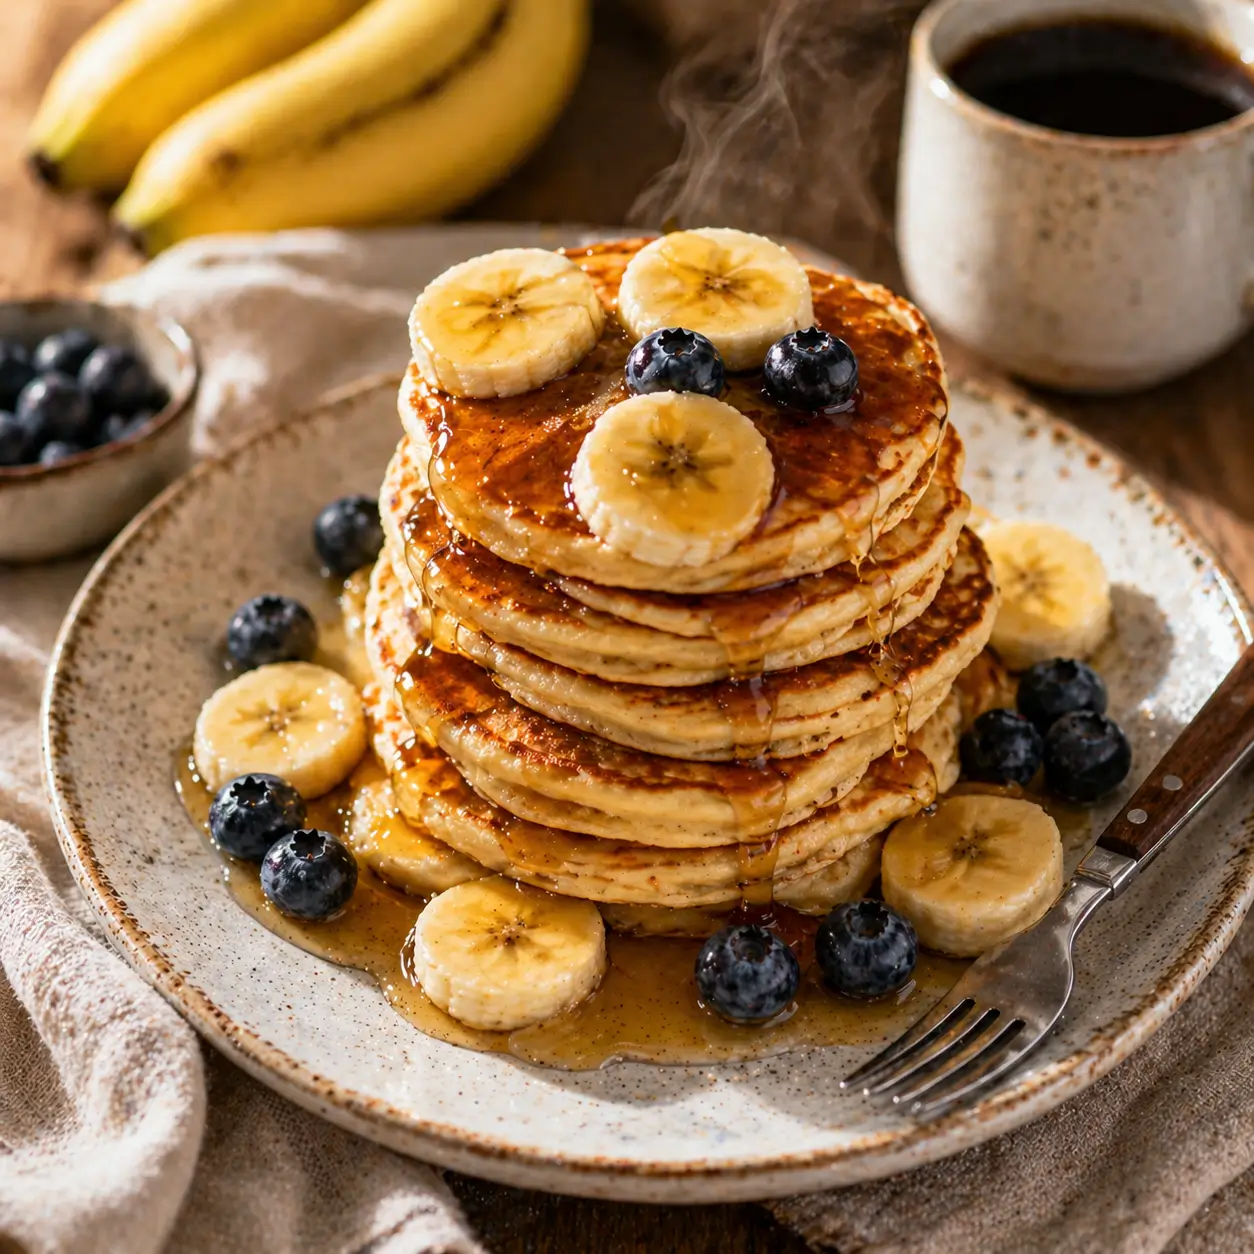
The texture is what really gets me. When you bite into one, there’s this soft, pillowy give, with little pockets of caramelized banana throughout. The edges get slightly crispy from the butter in the pan, while the center stays cloud-like. It’s the kind of thing that makes you reach for “just one more” until suddenly half the batch is gone.
The Simple Ingredient List
You probably have most of this already:
– 1 cup all-purpose flour
– 1 tablespoon sugar (or honey if you’re feeling fancy)
– 2 teaspoons baking powder
– 1/4 teaspoon salt
– 1 large ripe banana, mashed (about 1/2 cup)
– 3/4 cup milk (any kind works—I’ve used oat milk, almond milk, regular milk)
– 1 large egg
– 2 tablespoons melted butter, plus more for the pan
– 1/2 teaspoon vanilla extract
That’s it. No weird ingredients. No “extract of unicorn tears” or whatever food blogs sometimes throw at you.
How to Make Fluffy Mini Banana Pancakes
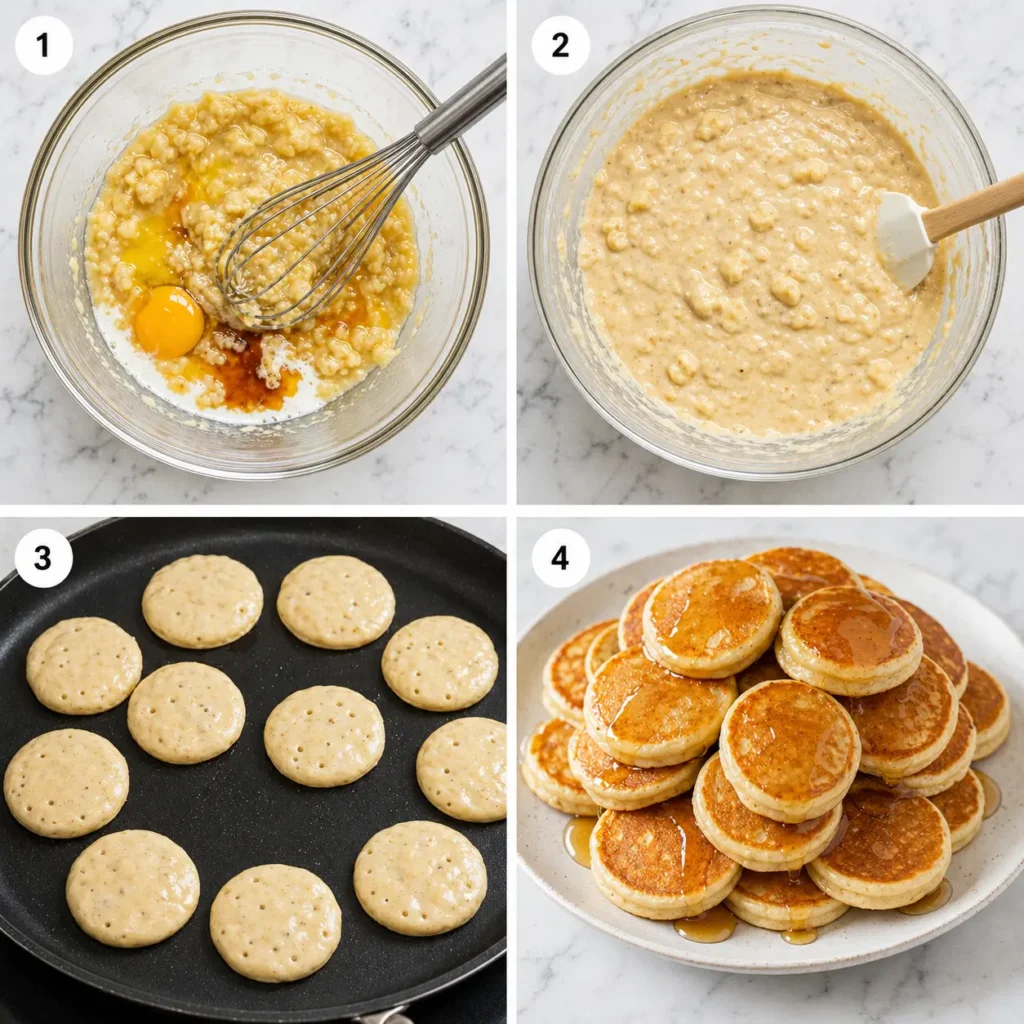
Step 1: Grab two bowls. In the bigger one, whisk together your flour, sugar, baking powder, and salt. In the smaller bowl, mash your banana with a fork until it’s mostly smooth (a few lumps are totally fine and actually kind of nice).
Step 2: Add the milk, egg, melted butter, and vanilla to the banana. Whisk it all together until it’s combined. It won’t be perfectly smooth because of the banana chunks, and that’s exactly what you want.
Step 3: Pour your wet ingredients into the dry ingredients. Here’s where people mess up—myself included, the first dozen times I made pancakes as a teenager. Don’t overmix. Seriously. Stir until you just barely can’t see dry flour anymore. The batter should look lumpy and a bit shaggy. If it’s smooth, you’ve overmixed, and your pancakes will be tough.
Step 4: Heat a non-stick skillet or griddle over medium heat. Add a small pat of butter and let it melt, swirling it around. The pan is ready when a drop of water sizzles immediately.
Step 5: Use a tablespoon or small cookie scoop to drop batter onto the pan. Make them about 2 inches across—seriously, keep them small. You should be able to fit 6-8 at a time dependin, depending on your pan size.
Step 6: Watch for bubbles. When you see bubbles forming on the surface and the edges look set (usually about 1-2 minutes), flip them. They should be golden brown. Cook another minute on the second side.
Step 7: Keep the finished pancakes warm in a low oven (around 200°F) while you finish the rest of the batch.
Pro Tips from Someone Who’s Burned a Few Batches
Don’t crank the heat. I know you’re in a hurry. I’m always in a hurry. But medium heat is your friend here. Too high and the outsides burn while the insides stay gummy. Trust me, I’ve served those pancakes to my family and watched them politely try to chew through basically banana-flavored cardboard. Not my finest moment.
The first pancake is a sacrifice. Accept this now. Your first pancake will probably be weird—too pale, too dark, misshapen. That’s your test pancake. It tells you if your pan is the right temperature. Eat it while you’re cooking and adjust accordingly.
Make them ahead of time for easy snack ideas for school. These freeze incredibly well. Make a double batch on Sunday, freeze them in a single layer on a baking sheet, then transfer to a freezer bag. Pop them in the toaster straight from frozen for a perfect breakfast option any morning of the week.
Add-ins are your friend. Mini chocolate chips, blueberries, chopped nuts—stir them in gently before cooking. My personal favorite is a handful of dark chocolate chips. It turns these into fast, sweet recipes that feel indulgent but still have fruit in them, so you can pretend they’re virtuous.
Brilliant Variations to Try
Chocolate Banana: Add 2 tablespoons of cocoa powder to the dry ingredients and an extra tablespoon of sugar. Suddenly, you have what tastes like dessert but is technically breakfast.
Peanut Butter Swirl: Warm up some peanut butter until it’s drippy, then swirl a little into each pancake right after you pour the batter on the griddle. Don’t stir it in—let it create ribbons.
Blueberry Banana: Fold in 1/2 cup of fresh or frozen blueberries. If using frozen, don’t thaw them first, or they’ll turn your batter purple.
Cinnamon Spice: Add 1/2 teaspoon of cinnamon and a pinch of nutmeg to the dry ingredients. This version is perfect for fall mornings.
Protein-Packed: Replace 1/4 cup of the flour with protein powder. I’ve used vanilla whey protein, and it works great. Add a splash more milk if the batter seems too thick.
Storage and Serving Ideas
Refrigerator: These keep for 3-4 days in an airtight container. Just reheat in the microwave for about 20 seconds or pop them in the toaster.
Freezer: Stack them with parchment paper between layers, seal in a freezer bag, and they’ll last for 2-3 months. This makes them perfect uni breakfast ideas when you’re stumbling to your dorm kitchen at 7 AM.
Serving suggestions: Sure, maple syrup is classic. But try them with Greek yogurt and fresh berries for an easy and healthy breakfast spread with almond butter and drizzled with honey. Sometimes I’ll make a batch without any sugar and serve them with scrambled eggs for a sweet-savory breakfast situation.
They’re also sneaky good for easy snack ideas for school lunches. Tuck a few into a lunchbox with some cheese and apple slices. Kids love them cold.
FAQ: Your Questions Answered
Can I make these without eggs?
Yes! Use a “flax egg” instead—mix 1 tablespoon ground flaxseed with 3 tablespoons water, let it sit for 5 minutes until it’s gooey, then use it in place of the regular egg.
What if I don’t have baking powder?
You can substitute with 1/2 teaspoon baking soda plus 1 teaspoon vinegar or lemon juice. Add the acid to your wet ingredients.
Why are my pancakes flat and not fluffy?
Usually, it’s old baking powder (it loses its oomph after about 6 months) or overmixing the batter. Check your baking powder by dropping a bit in hot water—it should fizz aggressively if it’s still good.
Can I use whole wheat flour?
Absolutely, but use half all-purpose and half whole wheat for the best texture. All whole wheat can make them a bit dense.
How ripe should the bananas be?
You want them yellow with brown spots. If they’re greenish, let them sit out for a few more days. Too green and your pancakes won’t be sweet enough.
Can I make the batter ahead of time?
I wouldn’t go more than an hour ahead. The baking powder starts working as soon as it hits liquid, so you’ll lose some of that fluffiness if you wait too long.
What’s the best way to reheat frozen pancakes?
Toaster is my favorite—it crisps up the edges nicely. Microwave works in a pinch (about 30-40 seconds), but they won’t be quite as good.
So here’s my question for you: what would you add to your batch? I’m always looking for new flavor combinations to try on Saturday mornings when I have an extra minute to get creative. Sweet? Savory? Something totally unexpected? Let me know in the comments—I’m genuinely curious what you’ll come up with!
Fluffy Mini Banana Pancakes
Ingredients
Equipment
Method
- In a large bowl, whisk together flour, sugar, baking powder, and salt until well combined.
- In a separate bowl, mash the banana with a fork until mostly smooth (a few lumps are fine). Add milk, egg, melted butter, and vanilla extract. Whisk together until combined.
- Pour the wet ingredients into the dry ingredients. Stir gently with a spatula until just combined. The batter should look lumpy and slightly shaggy – don't overmix or your pancakes will be tough. It's okay if you still see a few streaks of flour.
- Heat a non-stick skillet or griddle over medium heat. Add a small pat of butter and swirl to coat the pan. The pan is ready when a drop of water sizzles immediately upon contact.
- Using a tablespoon or small cookie scoop, drop batter onto the hot pan, making circles about 2 inches across. You should be able to fit 6-8 pancakes at a time depending on your pan size. Cook for 1-2 minutes until bubbles form on the surface and the edges look set.
- Flip the pancakes carefully with a spatula. They should be golden brown. Cook for another 1 minute on the second side until cooked through and golden.
- Transfer cooked pancakes to a plate and keep warm in a 200°F (95°C) oven while you finish cooking the remaining batter. Serve warm with maple syrup, butter, fresh fruit, or your favorite toppings.